The Guide to Long Exposure Photography
Painting with Time
Photography is generally obsessed with freezing time. We want incredibly fast shutter speeds to perfectly freeze a bird in flight, a runner crossing the finish line, or a child blowing out birthday candles. But what happens if you do the exact opposite? What happens when you leave the camera's shutter open for 5, 10, or even 30 seconds? This technique is known as Long Exposure photography, and it is the closest thing a photographer has to an actual magic trick.
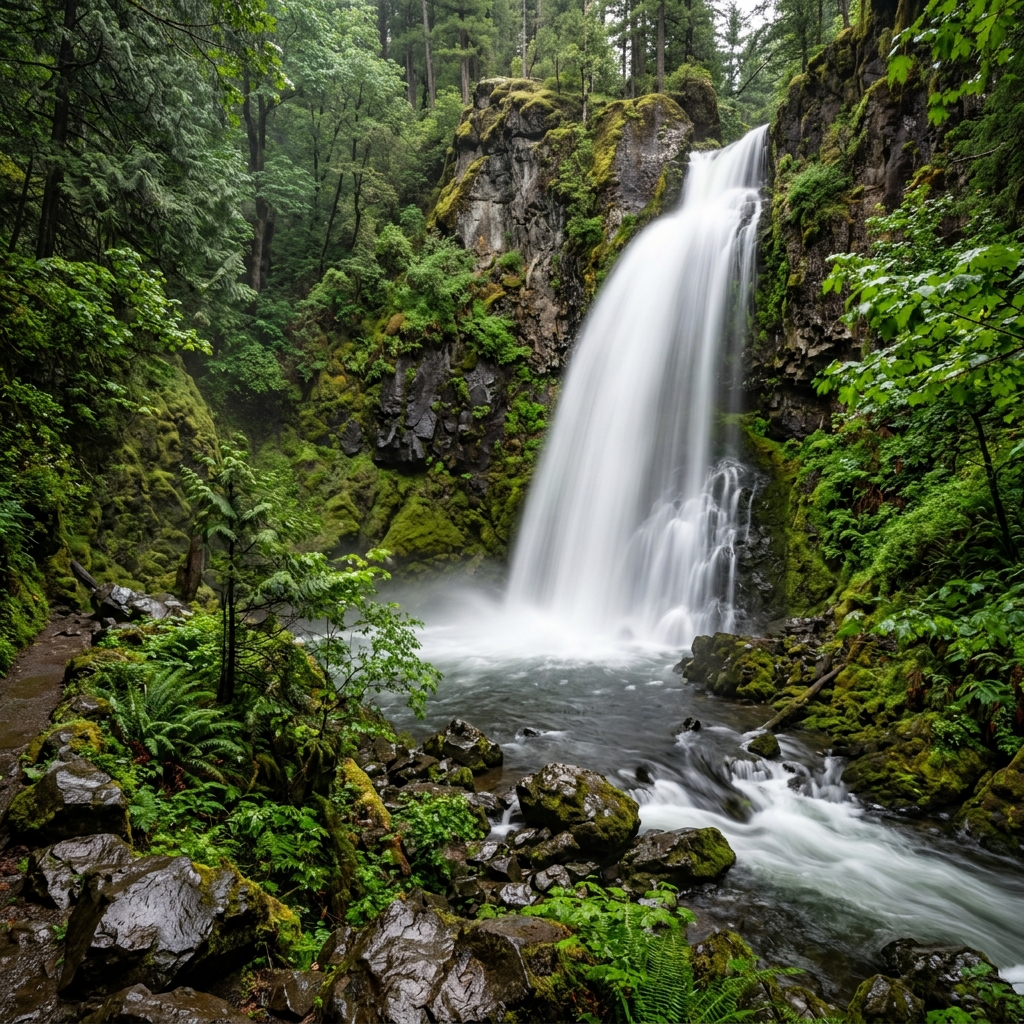
When you leave the shutter open, anything that is stationary (like rocks, buildings, or mountains) remains perfectly sharp and in focus. But anything that moves—water, clouds, cars, or people—blurs across the image. It allows you to visualize the physical passage of time in a single still image. I remember the first time I successfully shot a long exposure of a roaring, aggressive waterfall in Oregon. To my naked eye, the water was violent and chaotic. But when I left the shutter open for three seconds, the resulting photo transformed that violent water into a smooth, ethereal, glowing white mist that looked like it belonged in a fantasy movie.
The Essential Gear Checklist
You cannot simply decide to shoot a long exposure on a whim while holding your camera. You need a very specific set of tools to bend time.
- A Sturdy Tripod: This is non-negotiable. If you hold a camera for five seconds, the natural shaking of your hands will turn the entire photo into a smeared, unreadable mess. The camera must be locked down perfectly still.
- A Remote Shutter (or Timer): Even the act of your finger pressing the shutter button will shake the camera enough to ruin the photo. Use a cheap remote cable, or simply go into your camera menu and turn on the "2-Second Delay Timer" so the camera settles before the photo begins.
- An ND Filter (The Secret Weapon): ND stands for Neutral Density. Think of an ND filter as a pair of incredibly dark sunglasses that you screw onto the front of your lens. Why do you need this? If you try to take a 5-second photo of a waterfall in the middle of a sunny day, so much light will enter the camera that your photo will instantly become pure, blinding white. An ND filter blocks 99% of the sunlight, tricking the camera into thinking it is nighttime, which forces it to leave the shutter open longer to gather enough light.
Mastering the Water Flow
The most popular subject for long exposure photography is moving water. Rivers, waterfalls, and ocean waves all completely transform when you slow down the shutter. However, there is a delicate balance to strike.
If you leave the shutter open for too long (like 30 seconds) on a waterfall, the water loses all of its texture and turns into a flat, featureless white blob. You want the water to look smooth, but you still want to see the directional flow and the ripples. For fast-moving waterfalls and rivers, the "sweet spot" is usually between 0.5 seconds and 2 seconds. This is just long enough to blur the chaos into silk, but short enough to retain the beautiful textures of the water rushing over the rocks.
For the ocean, the rules are different. If you are standing on a beach with incoming waves and you want to completely flatten the ocean into a smooth, misty sheet of glass, you will need to leave the shutter open for 15 to 30 seconds.
Streaking Clouds and Light Trails
Water isn't the only thing you can blur. On a windy day, if you put a very dark ND filter on your camera and leave the shutter open for 30 seconds, the clouds moving across the sky will blur into dramatic, sweeping streaks of paint, giving your landscape photos an incredible sense of dynamic motion.
At night, you don't even need an ND filter, because it's already dark! If you set up your tripod on a bridge overlooking a busy highway and leave the shutter open for 15 seconds, the cars will disappear, and their headlights and taillights will stretch into massive, glowing red and white laser beams traveling through the city.
The Technical Setup
Here is the exact step-by-step process I use every time I shoot a long exposure landscape:
- Set up the tripod and frame your composition before putting the dark ND filter on the lens (otherwise you won't be able to see anything!).
- Switch to Manual Focus and make sure the landscape is perfectly sharp.
- Switch your camera to Manual (M) mode. Set your ISO to 100 (for maximum quality), and your Aperture to f/8 or f/11 (so the entire landscape is in focus).
- Carefully screw the ND filter onto the front of the lens without moving the focus ring.
- Dial your Shutter Speed down to 2 seconds (or whatever time you desire).
- Press the shutter button using your 2-second delay timer, and step back while the camera paints with time!


Comments
Post a Comment