Cinematic Rain Drives: Filming Road Trips Safely
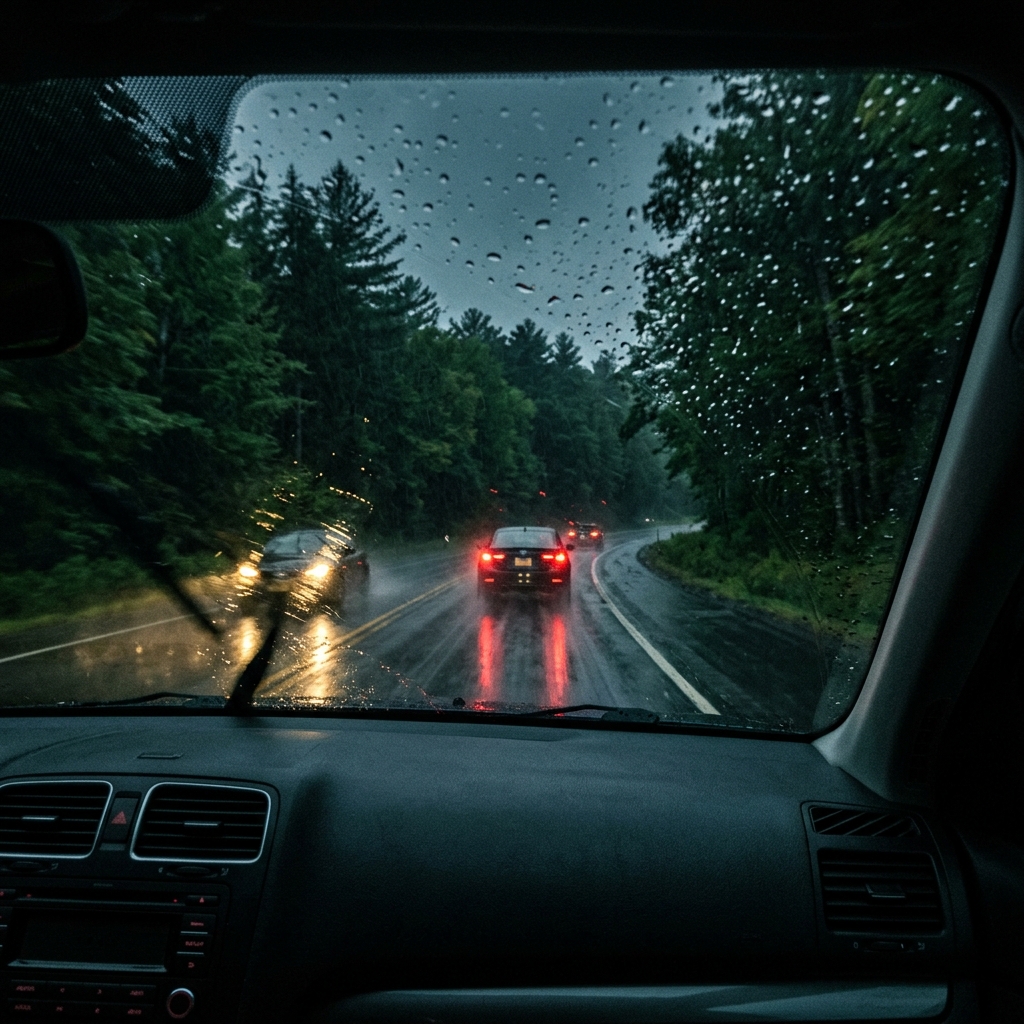
Finding Beauty in the Storm
There is a massive misconception that photography and filmmaking require perfectly clear, sunny, blue skies. When the storm clouds roll in and the rain starts pouring, 99% of people pack up their cameras and run indoors. As a result, 99% of the photos on the internet look exactly the same: bright, cheerful, and incredibly generic. If you want to create art that is truly cinematic, moody, and deeply atmospheric, you must learn to embrace the rain.
One of my favorite ongoing creative projects is mounting my camera to the dashboard of my car and filming "Cinematic Rain Drives." There is something incredibly therapeutic about driving through a dense, pine forest on a winding mountain road while rain sheets against the windshield. The world transforms. The dry, dull asphalt turns into a giant, glossy black mirror that reflects the glowing red taillights of the cars ahead of you. The colors of the forest become deeply saturated. It feels like a scene straight out of a Hollywood thriller. However, capturing this safely and professionally requires specific gear, settings, and a relentless focus on safety.
The Gear: Mounting the Camera
You absolutely cannot hold a camera while driving. Not only is it incredibly dangerous and highly illegal, but the footage will be nauseatingly shaky. You need a dedicated mounting system.
The Suction Cup Mount: Do not buy a cheap $10 plastic phone mount from a gas station. If you are mounting a $1,000 mirrorless camera to your windshield, you need a heavy-duty, professional suction cup mount (like those made by Fat Gecko or RAM Mounts). Clean the inside of your windshield with rubbing alcohol before applying the suction cup to ensure a perfect, unbreakable vacuum seal.
The CPL Filter (Crucial): This is the absolute most important piece of gear for shooting through a windshield. A CPL (Circular Polarizer) filter screws onto the front of your lens. Without it, your video will be ruined by the massive, glaring reflection of your car's dashboard in the glass. When you spin the CPL filter, it magically cuts through the glare, rendering the glass completely invisible and allowing your camera to see perfectly into the rainy world outside.
Camera Settings for the Perfect Vibe
Shooting a cinematic rain drive is all about controlling the mood. You do not want a bright, cheerful exposure. You want it dark, rich, and slightly under-exposed.
1. Frame Rate and Shutter Speed
If you are filming video, the cinematic standard is 24 frames per second (fps). To make the motion blur of the rain and the passing trees look natural to the human eye, you must use the "180-Degree Shutter Rule." This means your shutter speed should be exactly double your frame rate. Set your camera to shoot at 24fps, and lock your shutter speed to 1/50th of a second. This ensures the rain streaks beautifully across the screen, rather than looking choppy and digital.
2. Aperture and Focus
You have a creative choice to make here: do you want the raindrops on the windshield to be in focus, or do you want the road ahead to be in focus?
If you use a wide aperture (like f/2.8) and focus on the road, the raindrops on the glass will blur into massive, glowing orbs, creating a very dreamy, abstract look. If you stop down to f/8 or f/11, both the raindrops and the distant road will be in relatively sharp focus. I personally prefer keeping the aperture wide (f/2.8) and manually locking the focus onto the taillights of a car 50 yards ahead of me.
3. White Balance and Color Grading
Rainy days are naturally very "cool" (blue) in color temperature. Instead of letting Auto White Balance warm up the image and ruin the mood, I manually set my white balance to around 4500K to lean into the cold, blue, moody atmosphere. Later, in editing, I will often push the shadows slightly toward a deep teal green, which contrasts beautifully with the glowing red taillights of the traffic.
Safety Above All Else
No cinematic video is worth crashing your car. Once the camera is mounted, perfectly framed, and recording, you must forget that it exists. Do not look at the camera screen while driving. Do not reach over to change a setting while the car is in motion. If the exposure is wrong, pull over to the side of the road, put the car in park, adjust the settings, and pull back out. Let the camera roll continuously for 30 minutes, and simply focus entirely on driving safely in the hazardous conditions. You can edit out the boring parts later on your computer!


Comments
Post a Comment