A Beginner’s Guide to Night Photography
Conquering the Darkness
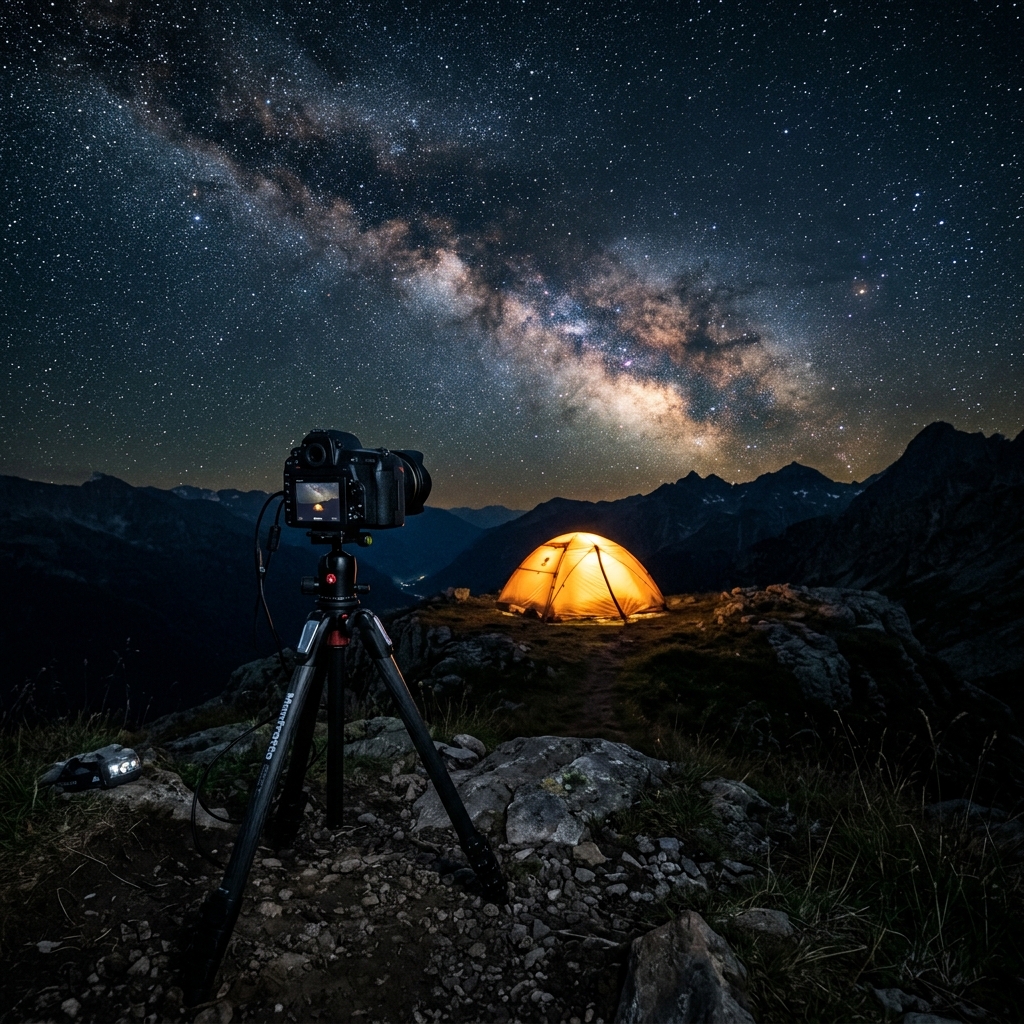
Most beginners put their cameras away as soon as the sun goes down. They try taking one or two photos in the dark, and the results are always the same: a blurry, grainy, pitch-black mess, or a harsh, ugly photo ruined by the camera's pop-up flash. For years, I did exactly the same thing. But one night, while camping deep in the wilderness away from city lights, I looked up and saw the Milky Way stretching across the sky. I knew I had to figure out how to capture it. That night fundamentally changed how I view photography.
Night photography is intimidating because you have to throw out almost everything you know about daytime shooting. In the daytime, your camera is fighting to limit the massive amount of sunlight. At night, your camera is starved for light, and you must use extreme settings to literally suck every available photon out of the darkness. It requires patience, specific gear, and a solid understanding of the Exposure Triangle. But once you master it, you unlock an entirely new world of creative possibilities: glowing cityscapes, light trails from passing cars, and breathtaking galaxies.
The Mandatory Gear: A Sturdy Tripod
Let me be incredibly clear: you cannot shoot professional night photography holding the camera in your hands. It is physically impossible. To gather enough light in the dark, your camera's shutter must stay open for seconds—sometimes even minutes—at a time. If you hold the camera, the natural microscopic shaking of your hands, your heartbeat, and your breathing will cause the entire photo to become a smeared, blurry disaster.
You must buy a tripod. It doesn't have to be a $500 carbon-fiber professional model, but it needs to be sturdy enough that a slight breeze won't knock it over. Once your camera is locked onto a tripod, it becomes a light-gathering machine. The shutter can stay open for 30 seconds, soaking in the faint light of distant stars, while the landscape remains razor-sharp.
The Magic Settings: Manual Mode is Required
You cannot shoot night photography in Auto mode. The camera's computer will panic, raise the ISO to maximum (ruining the photo with digital noise), and fire the flash (which will only illuminate the dust in the air three feet in front of you). You must switch your camera dial to Manual (M) mode.
1. Shutter Speed (The Light Gatherer)
This is your most important setting. For a glowing cityscape, you might need a shutter speed of 5 to 10 seconds. If you want to capture the headlights of cars stretching into long, red and white laser beams (light trails), you need 15 to 20 seconds. If you are shooting the Milky Way in pitch darkness, you will need 20 to 30 seconds. (Warning: if you leave the shutter open longer than 30 seconds for stars, the rotation of the Earth will cause the stars to blur into little lines, rather than sharp dots!)
2. Aperture (Opening the Eye)
Because you are starved for light, you need your lens to open as wide as physically possible. Set your Aperture (f-stop) to the lowest number your lens allows. If you have an f/1.8 lens, use it! If you only have a kit lens, set it to f/3.5. The wider the aperture, the more starlight can pour into the sensor.
3. ISO (The Digital Amplifier)
In the daytime, we keep ISO at 100 to ensure maximum image quality. At night, ISO 100 will leave your image completely black, even with a 30-second shutter. You must raise the ISO to digitally amplify the faint light. For cityscapes, ISO 400 to 800 is usually enough. For astrophotography, you will need to push your camera to the absolute limit: ISO 3200 or even ISO 6400. Yes, this will introduce "noise" (grain) into the photo, but a slightly grainy photo of the Milky Way is infinitely better than a perfectly clean photo of pure blackness.
The Secret to Sharp Focus in the Dark
Here is the most frustrating part of night photography: your camera's autofocus system is blind in the dark. If you point your camera at the night sky and press the button, the lens will helplessly hunt back and forth, unable to lock onto anything, and the camera will refuse to take the photo.
You must turn off Autofocus. Flip the physical switch on the side of your lens from AF to MF (Manual Focus). Now, turn on your camera's LCD screen (Live View). Find the brightest star in the sky, a distant streetlamp, or the moon. Use the digital zoom buttons on the back of your camera to magnify that light on the screen. Slowly turn the manual focus ring on your lens until that blob of light becomes a tiny, razor-sharp pinpoint. Once it is perfectly sharp, do not touch the focus ring again for the rest of the night.
Use a Remote Shutter or Timer
Even if your camera is on a heavy tripod, the physical act of your finger pressing the shutter button will cause the camera to vibrate slightly, which will blur a 30-second exposure. To prevent this, either buy a cheap remote shutter release cable, or simply go into your camera menu and turn on the 2-second timer. When you press the button, the camera will wait two seconds for the vibrations to stop before it actually begins gathering light. Happy shooting!


Comments
Post a Comment